- Why 58 mm Button Badges are a Popular Choice
- Understanding the 58 mm Badge Safe Zone
- The Importance of Button Badge Bleed
- Designing with Precision: Tips from Abhishek Design Studio
- Exporting Your 58 mm Badge Designs for Printing
- Beyond Design: Your 58 mm Badge Production Workflow
- Conclusion
- Frequently Asked Questions
- Related Articles
- Shop These Products
- References
✨ Featured Products

Abhishek Design Studio – Online Button Badge Design Tool (PNG/PDF Export)
₹1

58x58 mm Badge Template PDF File - Digital Download
₹100

58mm Button Badge | Pin Button Badge Raw Material
₹639

Button Badge Machine 58 mm - 1 Pressing Machine + 58 mm Mould
₹10500

61x61mm Square Die Paper Cutter | Square Button Badge Cutter | For Upto 300 Gsm Paper
₹4000

Button Badge Machine 32 Mm - 1 Pressing Machine + 32 mm Mould
₹10500

AP Film Template PDF File - Digital Download
₹100
58 mm Badge Safe Zone and Bleed Print Guide
58 mm Badge Safe Zone and Bleed Print Guide
Quick Summary
|- Use Abhishek Design Studio.
Mastering the 58 mm Button Badge: Your Guide to Safe Zones, Bleed, and Perfect Prints with Abhishek Design Studio
Creating eye-catching 58 mm button badges is a fantastic way to promote your brand, celebrate events, or simply express creativity. However, achieving a professional finish requires understanding key design principles: the safe zone and bleed area. Without these, your meticulously crafted designs can end up with cut-off text, awkward white edges, or misaligned graphics. This guide will demystify these concepts and show you how to leverage the Abhishek Design Studio – Online Button Badge Design Tool (PNG/PDF Export) for flawless 58 mm button badge production.
Why 58 mm Button Badges are a Popular Choice
The 58 mm button badge is a versatile and widely used size, striking a perfect balance between visibility and wearability. It offers ample space for logos, text, and intricate designs without being overly bulky. From corporate branding and event giveaways to personal accessories and political campaigns, the 58 mm badge is a staple in the world of custom merchandise. Its popularity means a consistent demand for high-quality, perfectly printed badges.
Understanding the 58 mm Badge Safe Zone
The safe zone is arguably the most critical area in your button badge design. Think of it as the 'no-fly zone' for anything you absolutely cannot afford to have cut off. When a button badge is pressed, the design is wrapped around the metal shell, and the edges are crimped. This process can cause a small portion of your design near the perimeter to be obscured or trimmed.
For a 58 mm button badge, the safe zone is the innermost circular area. All essential elements – your brand logo, key text, important imagery, and contact information – must reside entirely within this green boundary. If any critical part of your design extends beyond the safe zone, it risks being partially or completely cut off, leading to an unprofessional and ineffective badge.
How Abhishek Design Studio Helps: The Abhishek Design Studio – Online Button Badge Design Tool (PNG/PDF Export) automatically displays a clear green circle representing the safe zone once you select the 58 mm badge size. By keeping your primary design elements within this guide, you ensure they remain perfectly visible on the finished badge.
The Importance of Button Badge Bleed
While the safe zone protects your core design, the bleed area ensures your badge looks seamless and professional right to the edge. Bleed is the portion of your background design that extends beyond the final trim line of the badge. When the badge is assembled, this extra design material wraps around the edge of the metal shell. Without bleed, any slight misalignment during the pressing process could result in a thin, unsightly white crescent appearing along the edge of your badge, where the paper didn't quite reach.
For a 58 mm button badge, the bleed area is the outermost ring of your design. Your background colours, patterns, or images should always extend fully to the outer edge of this bleed line. This provides a buffer, guaranteeing that your badge will have full colour or design coverage across its entire face, even if there's minor shifting during production.
How Abhishek Design Studio Helps: The Abhishek Design Studio – Online Button Badge Design Tool (PNG/PDF Export) automatically incorporates the correct bleed for your 58 mm badge. When you apply a background colour or image, simply ensure it fills the entire canvas up to the outermost guide line. This eliminates guesswork and ensures a perfect wrap-around effect.
Designing with Precision: Tips from Abhishek Design Studio
The Abhishek Design Studio – Online Button Badge Design Tool (PNG/PDF Export) is specifically engineered to streamline your badge design process. Here are some pro tips to get the most out of it:
- Select Your Badge Size First: Always begin by choosing your target badge size and shape from the drop-down menu. For this guide, select '58mm'. The template will instantly load the precise bleed line and safe zone boundaries, giving you the correct canvas to work on.
- Utilize 'Show Guides': Keep the "Show Guides" option turned on during your design composition. These visual cues are invaluable for ensuring that crucial design elements remain within the green safe zone and that your background extends correctly to the bleed line, preventing any part of your design from being inadvertently rolled over the edges of the metal shell.
- The 'TOP' Indicator for Perfect Alignment: For badges with specific orientations (e.g., text that needs to be perfectly horizontal), keep the "Show 'TOP' Indicator" checked. This places a reference indicator at the top of your design. This is critical for orienting the printed graphics inside your Button Badge Machine 58 mm - 1 Pressing Machine + 58 mm Mould so the back pin is perfectly level and your design isn't crooked.
- Layer Management for Complex Designs: Take advantage of the built-in Layers panel on the right sidebar. This feature allows you to easily group elements, lock objects to prevent accidental movement, or rearrange the stacking order of text, shapes, and images. This is particularly useful for intricate designs with multiple components.
- Backgrounds and Gradients: Easily apply a solid background colour or a customizable gradient. You have options to adjust the gradient angle, allowing for dynamic and visually appealing backgrounds that extend perfectly to the bleed area.
- Text and Image Integration: Add text elements, customize font style, letter spacing, and choose between straight or curved text paths. You can also import your own graphics or photos, adjust their opacity, apply basic colour presets, and position them precisely within the design area. Remember to keep critical text and imagery within the safe zone.
Exporting Your 58 mm Badge Designs for Printing
Once your design is complete and you've ensured all critical elements are within the safe zone and backgrounds extend to the bleed, it's time to export. The Abhishek Design Studio – Online Button Badge Design Tool (PNG/PDF Export) offers flexible export options:

- Single Badge Export: You can save your design as a PNG, JPG, or SVG for individual use or digital mock-ups.
- Optimized A4 PDF Sheet for Bulk Printing: For production, the "PDF Sheet" option is your best friend. When printing a single design in bulk, use the "Current Page" export setting on the PDF Sheet option. This will automatically populate an entire A4 print grid with your badge designs, minimizing paper waste and optimizing your printing process. This feature is a huge time-saver for businesses producing large quantities of badges.
Beyond Design: Your 58 mm Badge Production Workflow
Designing is just the first step. To create a complete 58 mm button badge, you'll need the right tools and materials. AbhishekID provides everything you need for a smooth production workflow:

- Design: Use the Abhishek Design Studio – Online Button Badge Design Tool (PNG/PDF Export) to create your artwork, ensuring safe zones and bleed are correctly applied.
- Print: Print your designs using a high-quality printer and appropriate paper, such as A4 130 GSM Photo Paper High Glossy (Inkjet).
- Cut: Precisely cut your printed designs using a suitable cutter. For 58 mm badges, a 70MM Round Die Paper Cutter - For Upto 300 Gsm Paper is ideal.
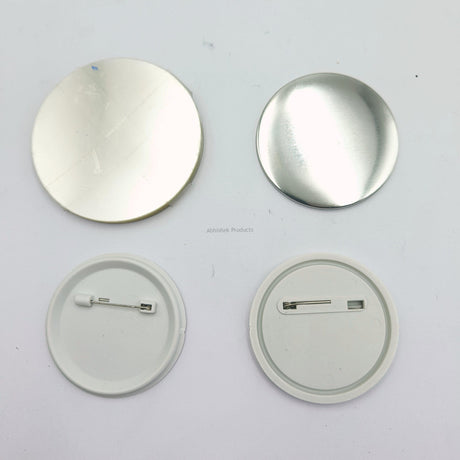
- Press: Assemble your badges using a reliable badge machine like the Button Badge Machine 58 mm - 1 Pressing Machine + 58 mm Mould and 58mm Button Badge | Pin Button Badge Raw Material.
For a visual walkthrough of the design process with Abhishek Design Studio, watch this helpful video: https://www.youtube.com/watch?v=Z4lMAwMB9Fc
Conclusion
Mastering the safe zone and bleed for your 58 mm button badge designs is essential for producing professional, high-quality results. The Abhishek Design Studio – Online Button Badge Design Tool (PNG/PDF Export) simplifies this process, providing intuitive guides and powerful features to ensure your designs are perfectly prepared for production. By following these guidelines and utilizing the right tools, you can create stunning 58 mm button badges that truly stand out.
Frequently Asked Questions
📋 Questions Covered
- What is the safe zone for a 58 mm button badge?
- Why is bleed important for button badges?
- How does Abhishek Design Studio help with 58 mm badge design?
- Can I use my own images and text in Abhishek Design Studio?
- What export options are available for my 58 mm badge designs?
- Where can I find 58 mm button badge raw materials and machines?